
Contents
As a senior developer with more than 10 years of handling Git repos, I’ve dealt with plenty of workflow issues. Imagine this: You’re in the middle of building a tricky feature. Your code is only half done, your local server is running, and you have uncommitted changes all over the place. Suddenly, an urgent bug report pops up in Slack from your teammate: “Hey, can you quickly check this on the main branch and see if it merges without problems?”
The classic response? Stash your work, switch branches, poke around, switch back, and unstash. It’s functional, sure, but it’s like putting your brain on pause every time. Context switches kill momentum, and let’s be honest, who hasn’t accidentally dropped a stash into the void? Also, it is a bit cumbersome to deal with multiple stashes.
Enter Git worktrees: a lightweight, underappreciated feature that lets you juggle multiple branches simultaneously without the drama. No more stashing rituals. In this post, I’ll break down what worktrees are, how to use them, and why they’re becoming essential in an era of AI-assisted development. We’ll walk through real-world examples, common pitfalls, and even setup tips for tools like Cursor. By the end, you’ll wonder how you ever lived without them.
A Quick Git Refresher: Why Worktrees Solve a Core Limitation
To appreciate worktrees, it’s worth zooming out on Git’s architecture. At its heart, Git is a content-addressable database wrapped in a user-friendly CLI. Your repository splits into two key pieces:
-
The
.gitDirectory: This is the magic vault. It holds every commit, branch reference, tag, and object in a compressed, efficient format. Think of it as your project’s immutable history ledger. -
The Working Directory: This is the editable sandbox; the files you see in your IDE or terminal. When you run
git checkout main(orgit switch mainin modern Git), you’re essentially asking Git to populate this directory with a snapshot of files from that branch’s latest commit.
Here’s the problem: By default, each Git repo has only one working directory. That means you can only have one branch “checked out” at a time. Switching branches replaces your files, so you have to commit, stash, or risk losing your work.
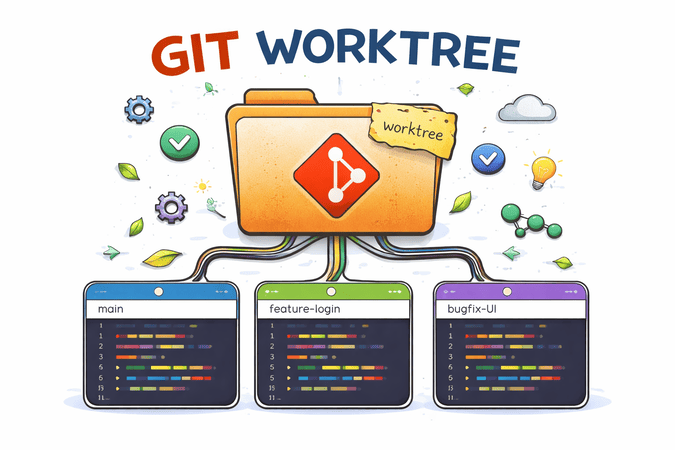
Worktrees change this. A worktree is a linked working directory: a separate folder that connects to the same .git database. You can have as many as you want (within limits; more on that later), each on a different branch. Changes in one don’t affect the others, but they all share the same commits, remotes, and references. It’s like having multiple tabs open in your browser, but for your codebase.
Fun fact: Worktrees were added in Git 2.5 in 2015, but they stayed under the radar until recently. With the growth of remote development and AI tools, they’re finally getting the attention they deserve.
The Essential Commands: Keep It Simple
Git worktrees boil down to three core commands. No need to memorize a novel; once you internalize these, you’re set.
1. Creating a Worktree
Kick off a new worktree with git worktree add. This clones the branch into a fresh directory while linking it to your main repo.
|
|
Example: You’re on your feature branch in ~/projects/my-app. Need to debug a hotfix?
|
|
Boom; ../my-app-hotfix now has the hotfix/user-auth-bug branch checked out. Your original folder? Pristine.
Pro tip: If the branch doesn’t exist yet, Git will create it for you from your current HEAD.
2. Listing Worktrees
Track your worktrees with a quick inventory:
|
|
Output might look like:
|
|
This shows paths, abbreviated commit hashes, and branch names. Run it from any worktree; it scans the shared .git.
3. Removing a Worktree
Done experimenting? Nuke it safely:
|
|
Git checks for uncommitted changes first and refuses if dirty (use --force at your own risk). The folder vanishes, but your history stays intact.
For cleanup on steroids, git worktree prune auto-removes stale entries (e.g., deleted folders). It’s a lifesaver after a frantic debugging session.
A Real-World Workflow: From Chaos to Calm
Let’s make this concrete. Imagine you’re building an itinerary planner app in React. You’re knee-deep in a feature branch, tweaking the sidebar component:
|
|
Your dev server (npm run dev) (see Web development setup) is running on port 3000, hot-reloading your tweaks. Enter the interruption: “Quick, does this PR from main break the auth flow?”
Old way: Stash, switch, test, switch back, pop. Sigh.
New way with worktrees:
-
From your feature branch, create a main worktree:
1
2
git worktree add ../itinerary-app-main main cd ../itinerary-app-main -
Fire up a second dev server (
npm run devon port 3001) (see Web development setup) and test the PR. Merge if needed:1 2git pull origin main # Or cherry-pick the fix git push origin main -
Clean up:
1 2cd ../itinerary-app git worktree remove ../itinerary-app-main
Back in seconds, no lost context. Your sidebar edits? Still there, server still spinning.
This scales beautifully for pair programming too; share a worktree path via Slack for collaborative debugging without repo cloning.
Gotchas You’ll Hit (And How to Dodge Them)
Worktrees are elegant, but they’re not magic. Here’s what trips up newcomers:
-
Branch Exclusivity: Each branch can only be checked out in one worktree at a time (including the main one). If
mainis active,git worktree add ../foo mainfails with “already checked out.” Switch first or use a detached HEAD. -
No Shared Artifacts: Worktrees are folders, not symlinks. Ignored files (e.g.,
node_modules/,.env) don’t copy over. Always:1 2 3# In the new worktree pnpm install # Or npm/yarn (see [Web development setup](/javascript/web-development-setup)) cp ../main-repo/.env.local .env.local -
The Main Worktree Lock: You can’t remove the original repo folder with
git worktree remove; it’s the “main” one. Usegit worktree moveto relocate it if needed. -
Limitations: Bare repos (no working dir) don’t support worktrees. Also, reflog and hooks are shared, so watch for conflicts in automated scripts.
Over time, these feel natural. Tools like IDE extensions (e.g., GitLens in VS Code) even visualize worktrees in your sidebar.
Worktrees + AI: The Future of Parallel Development
In 2025, AI-assisted development isn’t just autocomplete; it’s full-fledged collaboration. Tools like Cursor’s Parallel Agents leverage worktrees to run experiments in isolation, turning “what if?” into “try this safely.”
Here’s how it works in Cursor:
- You prompt: “Refactor this auth hook for better error handling.”
- Cursor spins up a worktree in
~/.cursor/worktrees/your-repo/; a sandbox copy. - The agent (powered by models like Claude or GPT-4o) edits, tests, and iterates there.
- Review diffs in a split view. Hit “Apply” to merge into your main worktree.
No pollution of your flow. And get this: Run the same prompt across multiple models simultaneously; each in its own worktree. Compare outputs side-by-side, cherry-pick the winner. It’s like A/B testing code generation.
This isn’t Cursor-exclusive. GitHub Copilot Workspace and even Replit’s AI agents are adopting similar patterns. As LLMs handle more complex tasks (e.g., full migrations or security audits), worktrees ensure your “human” branch stays sacred.
Automating the Setup: Make It Frictionless
Manual installs suck. For Cursor (or similar), add a .cursor/worktrees.json to your repo root:
|
|
$ROOT_WORKTREE_PATH auto-resolves to your primary repo. Commit this file; now every agent launch is seamless. For VS Code users, the Git Worktrees extension hooks into this too.
Extend it: Add linters (eslint . --fix) or tests (pnpm test) for even safer sandboxes.
When Not to Use Worktrees (And When You Absolutely Should)
Worktrees aren’t a silver bullet; disk space adds up (though Git’s efficiency keeps it minimal), and setup has a tiny overhead.
Use them when:
- Uncommitted work blocks a context switch (e.g., urgent reviews).
- Experimenting with risky refactors; throwaway worktrees are free.
- AI/parallel tasks demand isolation (e.g., “Generate three UI variants”).
- Collaborating remotely without full clones.
Skip them when:
- Your tree is clean, and it’s a 30-second
git switch. - You’re on a tiny repo where stashing feels negligible.
- Resource constraints (e.g., low SSD space on a laptop).
In team settings, document worktree etiquette; e.g., name folders semantically (hotfix/2025-12-30-auth) to avoid clutter.
Final Thoughts: Level Up Your Git Game Today
Git worktrees aren’t some arcane feature for Git wizards; they’re a practical upgrade for any dev tired of stash roulette. With just three commands, you reclaim hours lost to interruptions, and as AI tools proliferate, they future-proof your workflow.
Next time you’re mid-feature and a “quick check” derails you, pause. Fire up a worktree instead. Your sanity (and velocity) will thank you.
Resources
- Official Git Worktree Docs
- Cursor Parallel Agents Guide
- Bonus: Git 2.46’s Worktree Enhancements (for the tinkerers)
Happy branching! 🚀
Author
If you liked the above story, you can  to keep me energized for writing stories like this for you.